Pages

Saturday, December 22, 2012

Handmade Gifts For Him

Paracord Survival Bracelets

I wanted to share with you a few of the gifts I made for the guys this holiday. Now, I don't usually make them anything. Let's face it. It's kinda tough to make a guy a gift he might actually want, use or need. I don't know about you, but the boys in my life are a tough crowd. I like to make things. I like to give handmade gifts. I make jewelry, so the ladies in my life are all too easy, but the men are...well, not so easy. Until now, that is. Enter the Paracord Survival Bracelet. Hallelujah! Yep, I made those babies up there with a little help from this Etsy shop and this tutorial. I'm pretty excited about it. Finally, an accessory the guys might actually wear. What is Paracord, you ask? It's a parachute cord that is very strong and lightweight. The cord can hold up to 550 pounds and can be used for all sorts of outdoor activities and survival situations in the wilderness. It's long been used by military personnel and adventurer, outdoorsy types. The macrame-style bracelet allows one to carry several feet of this useful cord on their person at all times. If the cord is needed, simply take the bracelet apart to use it. These are all the rage right now and I'm on the bandwagon. A guy's accessory that's rough and rugged, multi-fuctional, looks cool, AND I can MAKE IT. Umm...Yes, Please!!! Oh, and they aren't just for the guys, either. I would totally sport one of these, too. Hopefully, for fashion reasons only.


 Dark Chocolate Pistachio Bark

Next up, dark chocolate pistachio bark with sea salt. YUM. This one's another all-around gift. Everyone on my list is getting some, but my guy inspired the idea. Josh LOVES pistachios and he loves dark chocolate. Put the two together and this is what you get. Super duper easy to make and package up to give. Who doesn't love an edible gift? And besides, the way to a man's heart is through his stomach, anyways. Right? ;)

What are you giving the guys on your list this year? Are you giving handmade?

Wednesday, December 19, 2012

Rhinestone Leather Wrap Tutorial

I'm really excited to share my latest tutorial for Ornamentea.com! The Rhinestone Leather Wrap is my design for December. This is a great versatile piece that can be worn multiple ways. First, it can wrap 5 times around the wrist. Second, it can be worn as a long necklace and third, it can be worn as a double strand necklace. It's red and sparkly and perfect for the holiday season. A perfect accessory to wear to a party. There's still time to order supplies and this project whips up quickly. Click the photos or the link above to be taken to the free project on the Ornamentea website.

Rhinestone Leather Wrap
Erin Siegel

Ingredients:

1 yard of red 3/16” deerskinleather lace
33 brass 5mm jump rings
1 brass 9mm spring clasp

Tools:
Scissors
Ruler
Pen
Chain nose pliers
Hole punch


1: Insert the leather lace into one fold over end and close with chain nose pliers. Attach the spring clasp to the fold over end as shown.


2: Lay the leather lace on the ruler. Use the pen to mark the center of the leather ¾” from the end of the fold over end. Mark the remaining leather every 1 ½”. Punch holes through all the marked places in the leather as shown.


3: Use 1 jump ring to string 1 crystal dangle and attach it to one hole in the leather lace as shown. Repeat 22 more times.


4: Trim the leather lace ¾” from the end. Insert the leather into one fold over end and close. Link 9 jump rings together to create a chain extender. Attach one end to the fold over end and attach the last crystal dangle to the other end as shown.

Resources: All materials and supplies from www.ornamentea.com

Monday, December 17, 2012

The Year In Jewelry 2012

The Year in Jewelry 2012
A collection of my favorite designs for each month of the year. The majority of these I have offered as online tutorials or free projects throughout the year. Enjoy the links!

January
February
March
April
May
June
July
August
September
October
November
December

Friday, December 14, 2012

Win Your Wish

 Ornamentea Win Your Wish Contest
Ornamentea started a fun contest called "Win Your Wish".  All you have to do is create a Wish List board on Pinterest.  Pin the image above, and tag it with #WinMyWish.  Visit www.ornamentea.com and start pinning classes, tutorials, tools and ingredients to your Wish List board and you could win one of your pins! Don't forget to tag all your pins with #WinMyWish so they can enter you to win! Visit www.ornamentea.com/WinMyWish.html to read all the rules and details. Good Luck and Get pinning! It's really fun to pin all the supplies and tools you wish you could put in your shopping cart.

Wanna see my wish list? Visit my Ornamentea Wish List Board to see what I've been pinning!

Wednesday, December 12, 2012

Spice Of Life Bracelet - Free Project

Spice Of Life Bracelet
Color is the spice of life! Use a rainbow of colorful Keith O'Connor ceramic beads to create an exciting bracelet full of fun.
Spice of Life Bracelet
Erin Siegel
 
Materials:
9 ceramic 12mm rounds (2 orange, 2 turquoise, 2 green, 2 purple and 1 pink)
9 Thai silver 7x10mm spiral charms
1 silver Greek ceramic 14mm flat chip bead
5 yards of charcoal grey 4ply Irish waxed linen cord
Tools:
Scissors
Ruler
Instructions:
1: Cut the cord in half. Find the center of the 2 pieces of linen cord and tie the 2 pieces together at the center point with a square knot. Continue tying square knots, one right after the other, until you have a knotted section 1½” long. Fold the knotted section in half and make an over hand knot at the base of the knotted section, creating a loop. You will now have 4 cords after the knot. Trim the ends of the cord even.
2: String the following, onto all four cords, tying an overhand knot after each: 1 green ceramic round, 1 spiral charm, 1 turquoise ceramic round, 1 spiral charm, 1 pink ceramic round, 1 spiral charm, 1 purple ceramic round, 1 spiral charm, 1 orange ceramic round, 1 spiral charm, 1 green ceramic round, 1 spiral charm, 1 turquoise ceramic round, 1 spiral charm, 1 orange ceramic round, 1 spiral charm, 1 purple ceramic round, 1 spiral charm.
3: Separate the cords in half and tie 3 square knots in a row. Bring the cords back together and string the Greek ceramic flat chip bead onto all four cords. Tie an overhand knot with all four cords together after the flat chip bead. Trim ends to ¼” and fray ends.

Resources:
Keith O'Connor ceramic rounds: The Beadin’Path. Thai silver spiral charms: Artbeads.com. Waxed linen cord: Ornamentea. Greek ceramic flat chip bead: Fire and Fibers.

Wednesday, December 5, 2012

Fringy Pearls and Leather Earrings - Free Project

Happy December, my friends!
Over the next couple of weeks, I will be posting some free jewelry projects. I hope you will enjoy them.
Fringy Pearls and Leather Earrings
I love the look of pearls and leather together. These earrings are quick and easy to make for gifts or for yourself. I also love how this earring project uses crimp cord ends in a unique way!

Fringy Pearls and Leather Earrings 
Erin Siegel 

Materials:  
12 silver 6mm potato fresh-water pearls 
2 copper 7x6mm rice fresh-water pearls 
2 antique silver-plated 12x6.5mm pewter crimp cord ends 
14 sterling silver 2” headpins 
6” of Black 2mm leather cord 
1 pair of sterling silver ear wires 

Tools:  
Wire cutters 
Chain nose pliers 
Round nose pliers 
Scissors

Instructions:
 
1: Use 1 headpin to string 1 silver pearl; make a double wrapped loop, making sure to make a loop large enough to string onto the leather. Repeat 5 more times. Use 1 headpin to string 1 copper pearl; make a double wrapped loop, again, making sure that your loop in large enough to fit on the leather.  
2: Cut the leather piece in half. Using one 3” piece of leather, string 3 silver pearl dangles, the copper pearl dangle and 3 silver pearl dangles. 
3: Bring the leather ends together and insert them into the crimp end finding. Crimp the crimp end with chain nose pliers. Attach an ear wire to the loop of the crimp end finding. Repeat steps to make the second earring. 

Resources: 
Ear wires: Miss Fickle Media. Leather and crimp ends: Artbeads.com.

Sunday, December 2, 2012

Belle Armoire Jewelry

"Bohemian Knotted Jewelry"

I am so excited and thankful to have my work featured in Belle Armoire Jewelry. It's a real honor to be among the pages of this esteemed magazine! Belle Armoire is known for high quality, high-end art jewelry. Amazingly talented, distinguished jewelry artists have graced the pages of this publication. Some of them are fellow jewelry friends I have had the pleasure of meeting. Even though I am a published author of a successful jewelry-making book, I never thought I would see my work in Belle Armoire. I like to stay humble. It keeps me grounded :) Seriously, I just didn't consider what I do to be a "fit" for the magazine...I'm still not sure. I can imagine other jewelry designers may feel the same way as well. Don't be afraid to submit your creations, you may be surprised!
 
African-Inspired Cuff and Del Sol Bracelet

I thank editor, Cynthia Levens, from the bottom of my heart for extending out an invitation to me to submit my jewelry and giving me this opportunity. My article in the Winter issue entitled "Bohemian Knotted Jewelry" looks so beautiful. It's a very proud moment for me. I even had the photographer inquire about buying one of my pieces that appears in the article as well. I'm absolutely flattered. That is the first time a publishing staffer has ever wanted to purchase my work. She must see so, so many incredible pieces through her lens. To want one of my pieces? Well, that feels really great. She did a fantastic job with the photos of my jewelry in the magazine and the rest of the staff did a wonderful job putting it all together!
Bohemian Knotted Earrings Collection
 
For all those interested in learning more about my knot work, pick up a copy of the latest issue of Belle Armoire Jewelry. You'll find step-by-step instructions for my Modern Bohemian Necklace, African-Inspired Cuff, Del Sol Bracelet and three pairs of earrings from my Bohemian Knotted Earrings Collection.

My friend and book co-author Lorelei also has a few jewelry pieces in this same issue. I'm so glad we are both a part of it together! Her pieces appear in the Boutique Gallery of Jewelry and they look awesome. Congrats, L!
 
On newsstands now!

Tuesday, November 20, 2012

Bodhi Day Necklace TUTORIAL

Much of my jewelry designing is influenced by foreign cultures and countries. I'm drawn to and intrigued by other cultural ideals, concepts, imagery, symbols and styles from all over the world. I am always thirsty for all kinds of knowledge and I have a health curiosity for things near and far. I love learning about how others live their lives around the world and why they do what they do. I can channel an experience of anything and travel to far off places through creating jewelry. That is one of the many reasons why crafting and creating is such an important part of my life.

The concepts and ideology of most eastern cultures resonate with me in particular. Recently, I was inspired by some research I did on a Buddhist holiday called Bodhi Day. On Bodhi Day, December 8th, people all over the world celebrate the Buddha's enlightenment and teachings. The Buddha attained enlightenment while sitting under a bodhi tree, which is a revered symbol in eastern cultures.

 Bodhi Day Inspiration Board

During Bodhi Day celebrations, it is customary to string multi-colored lights about the house. The multiple colors represent the many pathways to enlightenment, all of which are valid and respected. The lights are turned on beginning on the 8th of December and continue for the next 30 days. Candles are also lit at night to symbolize enlightenment. For many, the day is spent being mindful, meditating and practicing yoga. To learn more about how Bodhi Day is observed, visit here.

For November, I designed a necklace for Ornamentea.com inspired by what I learned about Bodhi Day.

Bodhi Day Necklace
designed for Ornamentea.com.
CLICK HERE to go to my FREE tutorial.
If you'd like to make your own Bodhi Day necklace, Check out my TUTORIAL at Ornamentea.com. This necklace would be a great piece to wear to yoga class, during meditation or any time you want to reflect and be mindful. Also, would make a great gift for yoga lovers on your gift list or anyone wanting a little bit of zen in their lives! So, feel the zen, say OM and make the Bodhi Day Necklace.
Namaste.

Ingredients:

- 1 Buddha head bead
- 1 yoga tree pose charm
- 1 filigree leaf charm
- 3 Czech glass 6mm beads
- 2 Czech glass 4mm beads
- 4 3" headpins
- jump rings
- 2 fold-over ends
- 1 spring ring 9mm clasp
- 2" of open extender chain
- 16" of white 2mm leather cord
- 2 yards of 4-ply Irish waxed linen cord in EACH color: garnet, orange, petunia and plum

Tools:

- Scissors
- Ruler
-Pair of chain nose pliers
- Round nose pliers
- Wire cutters
 
1. Close up all the jump rings and set aside. Use 1 headpin to string one 4mm bead, the Buddha head and one 6mm bead; form a wrapped loop. Use 1 headpin to string one 6mm bead; form a wrapped loop. Repeat once more. Use 1 headpin to string one 4mm bead; form a wrapped loop. Set all dangles aside as shown.
2. Bring all the cord ends together; insert all the cord ends into 1 fold-over end; close up the fold- over end as shown.

3. Use one strand of linen to wrap around the leather cord and the 3 other linen cords for ½" as shown. Repeat step, alternating the linen colors until the leather cord is completely covered. Once you have wrapped 6" down the leather cord, string on a jump ring. Pass the cord through the jump ring once more and continue wrapping. Add a jump ring along the cord at 1" intervals after the first one as shown.

4. Trim the linen cords and insert the leather and linen into the other fold-over end as shown.

5. Use a leftover piece of linen cord to tie the Buddha dangle onto the center jump ring with a square knot. Trim ends. Attach the yoga charm and filigree leaf in the same matter on either side of the Buddha dangle.

6. Attach the 6mm bead dangles to the remaining jump rings.
7. Attach the clasp to the ring of 1 fold-over end. Attach the piece of chain to the ring of the other fold-over end. Attach the 4mm bead dangle to the free end of chain.

Friday, November 16, 2012

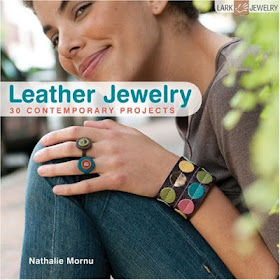
Book Review and GIVEAWAY: Leather Jewelry

Leather Jewelry: 30 Contemporary Projects by Nathalie Mornu

I'm giving away an author SIGNED copy of Leather Jewelry by Nathalie Mornu. Head on over to the Art Bead Scene blog to read my book review and enter to win!

Good luck
and
Happy Thanksgiving!

Saturday, November 10, 2012

Gypsy Ways Necklace Project

Gypsy Ways Necklace

A quick and easy bohemian-Inspired leather necklace featuring art beads by Heather Powers, Elaine Ray and C-Koop beads. Check out my FREE project tutorial over on the Art Bead Scene Blog!

And just for kicks, I put together a fun outfit to pair with the necklace:

Modern Gypsy

Saturday, November 3, 2012

Ears To You Earring Blog Hop

Collection of earrings designed to be donated to Ears To You organization

I'm participating in an earring blog hop hosted by jewelry designer, Amy Freeland of Copper Diem. Amy organized this earring hop to benefit a non-profit organization called:
Ears To You.
 Read my FULL post over at the Art Bead Scene blog. It's my turn for 'Studio Saturday' and you could win a copy of my Bohemian Knotted Earring tutorial. So, come visit me over on ABS!

This is a blog hop.

Sunday, October 28, 2012

Crystal Blossom Necklace and Earrings TUTORIAL

 Designed for Ornamentea.com

I'm really enjoying my gig as an Ornamentea contributing designer. It is SO MUCH FUN coming up with jewelry designs to share with the beading community. I love making hip, stylish jewelry I would wear myself and working with the supplies from Ornamentea makes that easy. So, now it's time to share my jewelry tutorial for October. I created this Crystal Blossom Necklace and Earrings set using hammered brass rings, Irish waxed linen cord and Swarovski crystal briolettes. The necklace is long and makes a perfect accessory for flowy tops and sweaters. The earrings can be worn with the necklace or they can make a statement all on their own. The set I made is appropriate for Autumn with these colors, but you could easily play around with the colors of waxed linen cord and crystal drops to create a different look. I would make a set for every season! Find all the materials and FREE TUTORIAL here. I hope you enjoy my jewelry tutorials just as much as I enjoy making them.


Ingredients for the necklace:
- 14 faceted 6x10mm crystal drops
- 1 hammered 33mm naked brass ring
- 1 yard of antique brass cable chain
- 2 antique brass 3x4mm oval jump rings
- 24" of Irish waxed linen

Ingredients for earrings:
- 14 faceted 6x10mm crystal drops
- 2 hammered 33mm naked brass ring
- 2 antique brass jump rings
- 48" of Irish waxed linen
- 1 pair of posts with backs 
Tools:
- Scissors
- Ruler
- Chain nose pliers
 
1. Use linen cord to form an overhand knot around the brass ring, leaving a 1/2" tail as shown.

2. Use the long end of the cord to form 2 half inch-hitch knots around the ring and the cord tail as 
shown. Trim short tail.

 3. Form 10 half-hitch knots around the ring. String 1 crystal drop and form 3 half knots around the ring as shown. Repeat 6 more times. 
 4. Form 10 half-hitch knots around the ring. Form an overhand knot after the last hitch knot. Trim close to the knot and press it down against the back of the ring as shown.

 5. Use 1 jump ring to attach the ring to one end of the chain. Repeat with the second jump ring and the free end of chain.

For the earrings:
1. Repeat steps 1-4 above for each earring.

2. Attach a jump ring to hammered ring. Connect the jump ring and ear post together as shown. Repeat step for the second earring.

Tuesday, October 23, 2012

Fleur Jolie Shabby Chic Necklace

Months ago, Kashmira of Sadafulee...always in bloom, sent me a pretty crochet flower she had made herself. She said she'd be interested to see what I would create with it. Well, how could I refuse a challenge like that! And, so below is the crochet flower, as Kashmira sent it to me. Isn't it beautiful? I wish I could crochet something like that!
 
Initially, I had a few ideas about what I was going to do with it. My first necklace design idea didn't work out too well. I took that necklace apart and set the flower aside, thinking about what to do next. It certainly would look fantastic as the focal on a cuff bracelet, I thought. I was more than a little tempted to stitch it right onto this leather cuff bracelet I bought from Ornamentea and call it a day....

 That would have been all well and fine, but just a little too easy. I wanted to make something more challenging and create something with more interest and fun.  

Lately, I've been captivated by the idea of shabby chic jewelry. I'm feeling a bit surprised at my attraction to the esthetic of shabby chic style. The usual pastel color palette and frilly, girly style is a little out of my comfort zone, which I find intriguing.  I do absolutely love the contrast of elegant, refined elements mixed with earthy, rustic elements, which this style is known for and shabby chic is sort of another flavor of bohemian style. And of course, being drawn to that is no surprise at all. So, I wanted to design a piece of jewelry with a shabby chic look and feel to it. Below is my finished necklace. I call it Fleur Jolie, which means "pretty flower" in French.

 Fleur Jolie Shabby Chic Necklace 
Kashmira's flower really wanted to be a focal piece on a necklace, so the first thing I did was create a flower "stamen" in the center with some red Irish waxed linen cord. It adds additional interest and a pop of color. The flower is fairly large for a pendant, so I wanted to balance it by creating a statement, multiple strand necklace. Since there is so much texture going on with the crochet flower and the multiple strands, I kept the bead colors muted and neutral. Faceted Czech glass beads in grey and glass pearls in peach-grey keep the focus on the focal. For a pop of color, I knotted the beads on 2-ply red Irish waxed linen cord. Yes, I hand knotted in between every one of those 4mm beads! The small scale of the beads keeps the necklace feeling airy, feminine and light. For a touch of rustic, the crochet flower pendant is tied on with a soft piece of suede lace and the necklace is finished off with a leather button. 

Kashmira, thank you for your lovely crochet flower. With your flower, I was able to explore a new design style that I love. I hope you enjoy the necklace I created!

Wednesday, October 17, 2012

October Jewelry Designer Interview


I am truly humbled and honored to be this month's Jewelry Designer Interviewee over at jewelrymaking.about.com. Click here to read my Q&A and what author, Tammy Powley had to say about me. Come join us for a jewelry chat!
Also, you can read a book review Tammy wrote about our book, Bohemian-Inspired Jewelry on the website, here. Thanks for having a looksy!

Tuesday, October 16, 2012

Happy 2nd Birthday!

 My Nora girl turns 2 years old! I planned an Ocean-themed kids birthday party for her this year. Fish, sea stars and penguins are some of her favorite things. We held the party at the New England Aquarium in Boston. I think I had just as much fun as the kids. After all, I did get to make cutesy, sea-life-themed cupcakes for all our guests! Here's a few pics from our day at the aquarium.

 Happy 2nd Birthday, Sweetie!